Installation
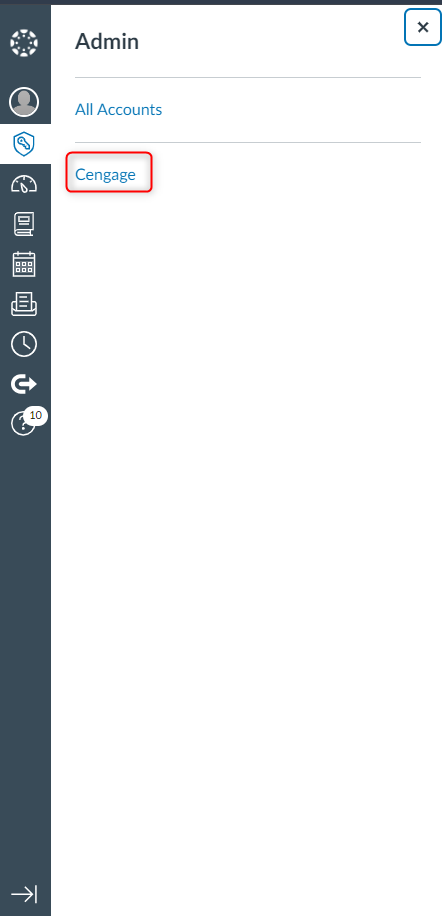
Click the Admin shield with a key inside.

Select the Districts Name.
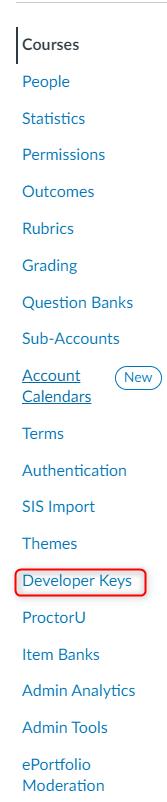
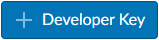
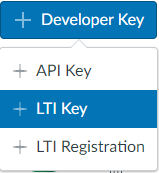
Click + Developer Keys.
Click + Developer Key > Click + LTI Key.
Under Key Name on the left hand side. Enter in the Database Name that is being connected.
Under Redirect URIs enter https://link.gale.com/apps/lti/launch
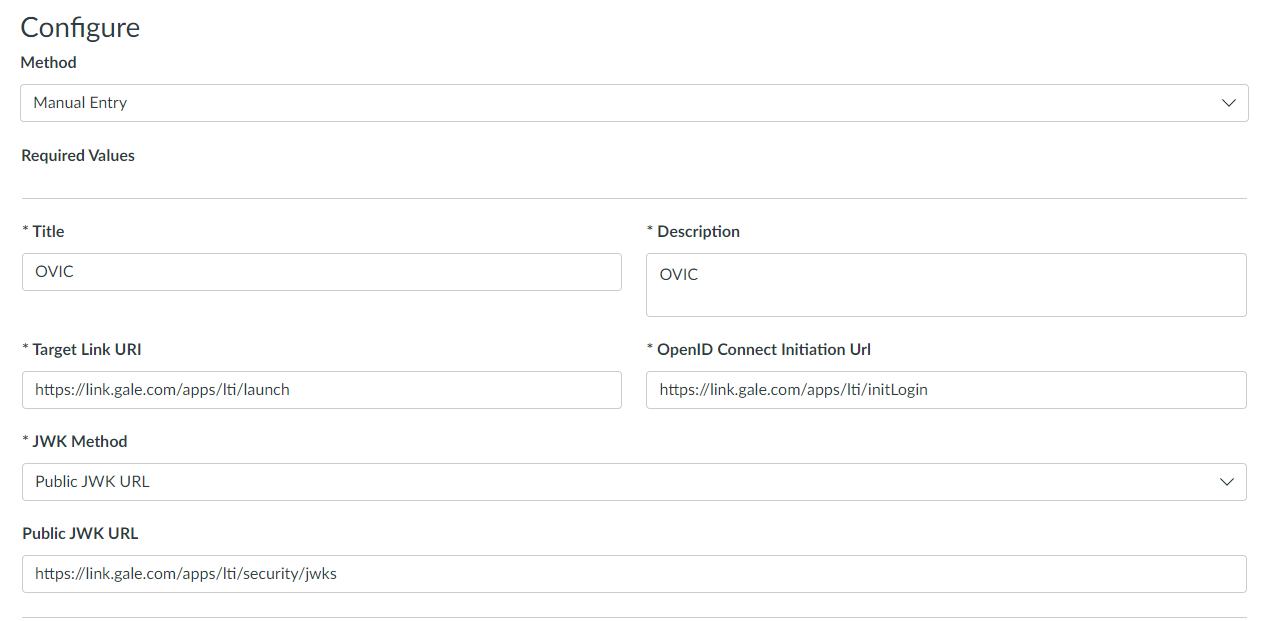
Under Title enter the name of the database.
Under Description enter the name of the database.
Under Target Link URI enter https://link.gale.com/apps/lti/launch
Under OpenID Connect Initiation Url enter https://link.gale.com/apps/lti/initLogin
Change JWK Method from Public JWK to Public JWK URL.
Under Public JWK URL enter https://link.gale.com/apps/lti/security/jwks
Scroll down to Additional Settings and expand it.
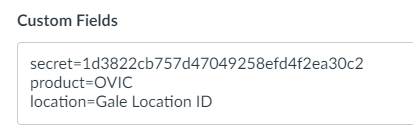
Under Custom Fields enter secret and set it equal to the LTI secret from Gale Admin. Enter product and set it equal to the Gale database code. Please make sure it is in all capital letters. Enter location and set it equal to the Gale Location ID.
(If you are unsure of a database’s product ID, please navigate to https://support.gale.com/urls/ and enter your Location ID to see a full list of your products and their product IDs.)
Please note: Not all Gale databases are LTI certified and support deep linking, to see a list of certified Gale databases, go to https://support.gale.com/doc/lmsinstall-urls or our Gale LTI Certified Products List Third party databases such as Udemy, Peterson’s and Miss Humblebee’s Academy do not support placement functionality.
Under Placements set Editor Button, Course Navigation, and Link Selection.
Under Placements expand Editor Button Set the Target Link URI to https://link.gale.com/apps/lti/launch
Under Icon Url (required unless present in Additional Settings) set it to https://link.gale.com/apps/resources/images/gale-logo.jpg
Under Text enter the database code in all capital leters.
Under Section Height enter 600 under Section Width enter 1000
Click the Save button in the bottom right of the screen.
Copy the Client ID from the Details column.
Flip state toggle to green check mark.

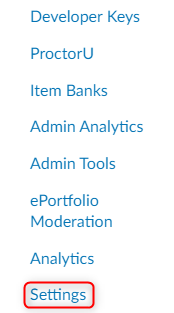
Scroll down to Settings.
Click on Apps.

Click View App Configurations.

Click + App.

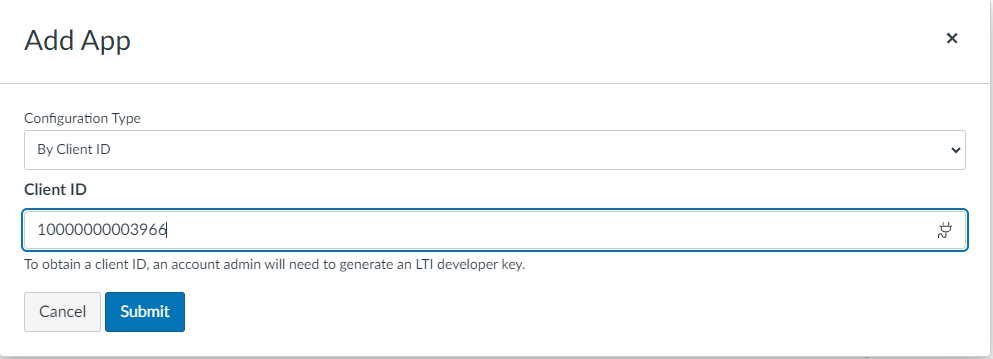
Change the configuration drop down from Manual to By Client ID and paste your copied Client ID and click Submit.

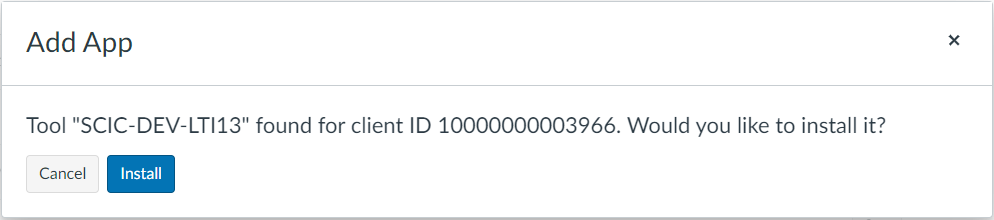
Click Install on the Tool that was located by the Client ID.
Canvas will provide a notification that the app was added successfully.

Navigate to a course and notice the app at the end of the navigation menu.